Change Facebook login page style  

Posted by Karan Vora


On daily basis, lot of users open Facebook Login webpage to access their Facebook account and check the latest activity. Are you bored of usual Facebook.com login webpage? You can easily spice up the login page for Facebook website by adding a cool background photo. After the change, the Facebook Login form is displayed in a translucent style against the your selected background photo.

FB Refresh Chrome extension for Facebook login page

Google Chrome users accessing Facebook website can easily customize the start page with custom background photo and neatly styled login box in few simple clicks.
1. Launch Google Chrome browser on your computer. Then open FB Refresh extension webpage in Chrome browser. Click ‘Add to Chrome’ button for automatic download and install.
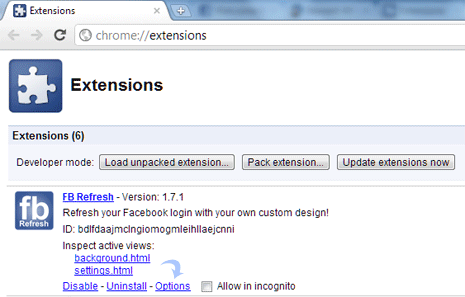
2. After install, we need to open FB Refresh options screen to add background photo URL. For this, click Wrench icon at top right and then goto Tools > Extension. Then click Options button under “FB Refresh : Refresh your Facebook login with your own custom design!”
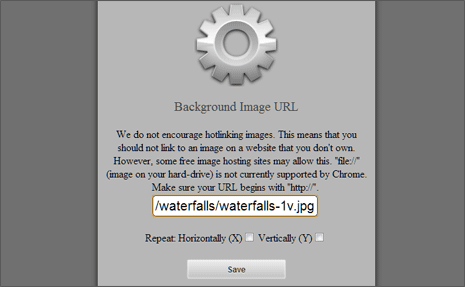
3. On the options screen, paste or type URL of image that you want to display as background of Facebook login page. Then click Save button to confirm changes. Now goto Facebook.com and see all new style and look of the login page.
You can enter URL of any publicly available wallpaper (where hotlinking is allowed). If you are lost on options, open wallpaper of your choice. Once wallpaper image is opened in full, right click on it and then click ‘Copy Image URL’ option. Then paste copied image URL in the box on options screen of FB Refresh extension.

Windows 7 GodMode  

Posted by Karan Vora


GodMode on Windows 7Here’s a neat Windows 7 trick that’s been doing the rounds on the Internet. It enables “GodMode,” a term devised by the Microsoft development team, which provides a single place to access all Windows settings without needing to browse options and folders in the Control Panel.
To use it:
  1. Create a new folder.
  2. GodMode windowRename the folder to
    GodMode.{ED7BA470-8E54-465E-825C-99712043E01C}
    (note that you can change the “GodMode” text, but the following period and code number are essential).
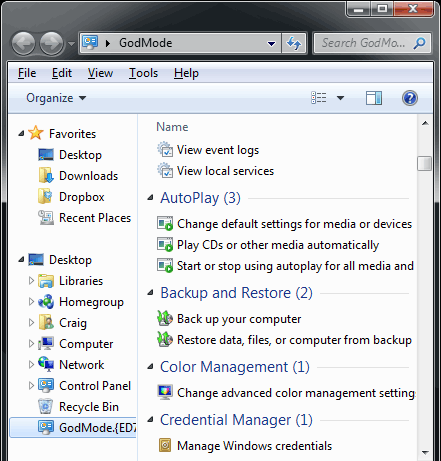
  3. The folder icon will change — double click it to show the GodMode window:
GodMode window
The window shows nearly 50 sections with quick links to configuration options. Strictly speaking, it’s not a God Mode since all the options are available elsewhere. It’s more akin to an “all tasks” list — but you may find it easier than stumbling through Windows numerous screens and panels.

Big Red Warning!

The trick appears to work on both the 32 and 64-bit versions of Windows 7. Vista 32-bit and Windows Server 2008 32-bit should also work. However, it is known to crash 64-bit versions of Vista — and you may need to boot in safe mode or to the command line to delete the folder.

How To Write Android Application?  

Posted by Karan Vora

Want to know how to write Google Android apps? Android applications are written in Java – a relatively easy to learn, friendly language for new developers. If you’ve got innovative ideas and the drive to see them spread, the Android market is for you! Let’s get you started on your very first Android application.
Before we get to how to write Google Android apps – first, a bit of overview. Android apps (much like almost any mobile app) are developed on a computer – PC or Mac (generally) – and then compiled and sent to the device for testing. If you don’t have an Android device yet, there are emulators that simulate an Android device on your computer, meaning that you can still develop an Android game or application without owning one.

Step 1: Get Eclipse

For this tutorial, I’m going to use Eclipse, because frankly it’s the easiest and most hassle-free development tool for Android right now. If you’re a NetBeans programmer, be my guest; but I’ll use Eclipse today.

Step 2: Download The Java JDK

If you don’t have it already, you need to download the Java JDK 6. If you currently have the JDK 5, you should be okay, but there’s really no reason not to update. Just install it by downloading and then running through the setup to get things going. I’d recommend that you just hit next–>next–>finish, rather than doing anything fancy. Once you get things working, you can mess around a bit.

Step 3: Download The Android SDK Tools

Next, you’ll need to get the Android SDK Tools straight from Google. Unpack and install this to a directory you’ll remember – you need to reference this in the next few steps.

Step 4: Configure Eclipse For Your Android

Start Eclipse, and head to ‘Help>Install New Software‘. Hit  “Add…” and for the name, type “Android” and set the link to “https://dl-ssl.google.com/android/eclipse/” (if this doesn’t work, try it with http:// instead of https://).Click “OK” and the following should appear.
how to write Google Android apps
Select both of the resulting packages, and hit next – this will download the Android ADT(Android Development Tools). Go ahead and start the download to obtain these two packages. Restart Eclipse (it should prompt you to on completion of the downloads). We’re almost ready to start coding.

Step 5: Configure The Android SDK

Navigate to the folder you downloaded/unpacked the Android SDK to. In there, you’ll find a file named “SDK Setup.exe.” Start that file – the following dialogue should appear.
how to write Google Android apps
Don’t feel obligated to download every single thing. Could it hurt? Not really. For me, however, I only really want to program for Android 2.1 and 2.01, so those are the only API packages I bothered to get (someday I may pay for my folly, but not today). Either way, get what you want (and you do need to pick one) and hit install. The SDK manager will install it for a little while – go grab a snack.

Step 6: Set Up Your Android Virtual Device (AVD)

Now that you’ve finished yet another painful download, click over to “virtual devices” (still in the SDK Manager). We’re going to create an Android device that will test run your programs for you! Hit “New” to create a new Android device, and put in the specifications that you want it to have. In the screenshot below, you’ll see the options I wanted (that closely mimic that of my Motorola Droid).
how to write Google Android apps
Click “Create AVD” to–well–create your AVD. Select your AVD from the list, and hit “Start” to make sure that you do indeed have a working emulation of an Android phone. After a pretty lengthy start-up wait, it should look something like this.
writing google android apps
Fool around with it and explore for a bit if you want, then close it up so we can get back to work.

Step 7: Configure Eclipse Again

Remember that Android SDK we got earlier? We didn’t do anything with it. Now, it’s time to tell Eclipse where it is so Eclipse can use it as a resource. To do this, open Eclipse and navigate to Window>Preferences (or on Mac, Eclipse>Preferences) and select the Androidtab. As shown below, browse to the location of your Android SDK and hit “Apply“.
writing google android apps
Everything check out so far? Hit “OK” to save everything and let’s go program.

Step 8: Create A New Project

It’s finally time to code some. Navigate to ‘File>New>Other…>Android>Android Project‘, and input a project name, as well as some other details. If you want, copy from my screenshot below. Some of the fields need explaining that simply doesn’t belong here, so if you want to know more specifically, please let me know and maybe I’ll write an article about it.
writing google android apps
Hit “Finish” and the project will be created.

Step 9: Input Your Code

In the tree on the left, navigate to the “src” folder and expand everything. Go to the file with the name of your “Activity” (created in step 8, mine was HelloWorld) and double click it to see the contents. Presently, your code has all of the content in black (with some minor modifications depending on your settings). To make a working “Hello world” program, you need to add the text that is in bold red. Note that there are two bold red “blocks” of code, and you need to add both to make things work.
//==========Start Code============
package com.android.helloandroid;

import android.app.Activity;
import android.os.Bundle;
import android.widget.TextView;

public class HelloAndroid extends Activity {
   /** Called when the activity is first created. */
   @Override
   public void onCreate(Bundle savedInstanceState) {
       super.onCreate(savedInstanceState);
       TextView tv = new TextView(this);
       tv.setText("Hello, Android");
       setContentView(tv);
   }
}
//==========End Code============
I would love to explain all of the code, but that’s not exactly the point of this tutorial; the point is to get your feet off the ground. I know some/most of this is confusing; but it’s just how things are wired.

Step 10: Run Your Program

Above your code, you’ll see a little green “Play” button (or navigate to ‘Run>Run‘). Click it.When a popup box asks you how to run the application, you’re going to tell it to run as an “Android Application”. It will prompt you to save changes; hit yes.
Now you get to wait an eternity while your virtual device boots up. I’d recommend that you leave it open for the duration of your programming sprees, otherwise you’re going to spend more time watching the Android logo spin than you will watching your program freeze up. Just saying. Efficiency.
After everything’s done loading, your application should upload and start automatically. Which means that right after you “unlock” the device, you’ll be greeted with your first Android program.I only captured the top half of the screen because the rest of it is black.
make google android apps
That’s it, congratulations! The task can be a bit daunting at first; and definitely confusing, but if you stick with it you won’t be disappointed. If you step back and think about it, we only did a few really major things, the rest was just the process of connecting the pieces to make everything work.
Do you want to become an Android developer? Have you ever written an Android app, and if so, what did it do? As always I love getting feedback in the comments section. As someone who answered yes to the first question, I’m in the process of learning to adequately code for my Android device, so do you have any websites or pointers that would help me or a fellow Android newbie out?

World's Smallest Operating Systems  

Posted by Karan Vora

This post is about the desktop operating systems that fly under the radar of most people. We are definitely not talking about Windows, Mac OS X or Linux, or even BSD or Solaris. There are muchless mainstream options out there for the OS-curious.
These alternative operating systems are usually developed either by enthusiasts or small companies (or both), and there are more of them than you might expect. There are even more than we have included in this article, though we think this is a good selection of the more interesting ones and we have focused specifically on desktop operating systems.
As you will see, many of them are very different from what you may be used to. We will discuss the potential of this in the conclusion of this article.
Enough introduction, let’s get started! Here is a look at some alternative operating systems, starting with a familiar old name…

AmigaOS 4.1

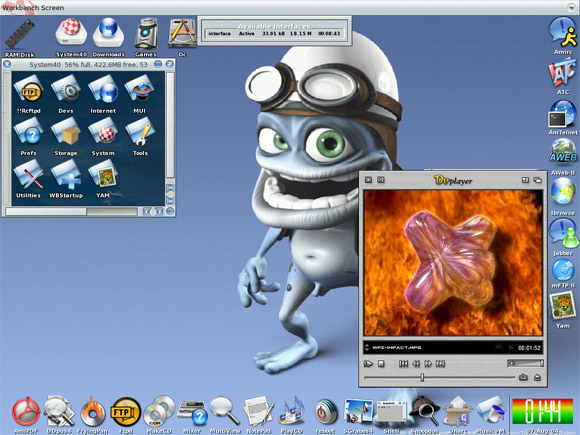
AmigaOS is a veteran in the field (many have fond memories of the original Amiga computer), its current version is a fully modern OS.
AmigaOS only runs on specific PowerPC-based hardware platforms. The company ACube is currently marketing and distributing AmigaOS and is going to bundle the OS with their motherboards.
Source model: Closed source
License: Proprietary
Platform: PowerPC
State: Final

Haiku

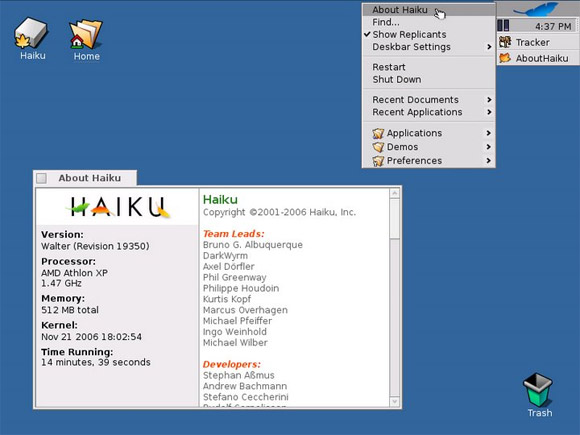
Haiku is an open source project aimed at recreating and continuing the development of the BeOSoperating system (which Palm Inc. bought and then discontinued). Haiku was initially known as OpenBeOS but changed its name in 2004.
Haiku is compatible with software written for BeOS.
Source model: Free and open source
License: MIT License
Platform: x86 and PowerPC
State: Pre-Alpha

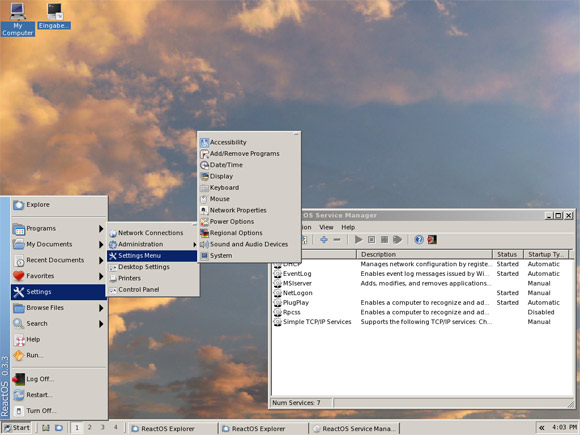
ReactOS

ReactOS is an operating system designed to be compatible with Microsoft Windows software. The project started in 1998 and today it can run many Windows programs well. The ReactOS kernel has been written from scratch but the OS makes use of Wine to be able to run Windows applications.
Source model: Free and open source
License: Various free software licenses
Platform: x86 (more under development)
State: Alpha

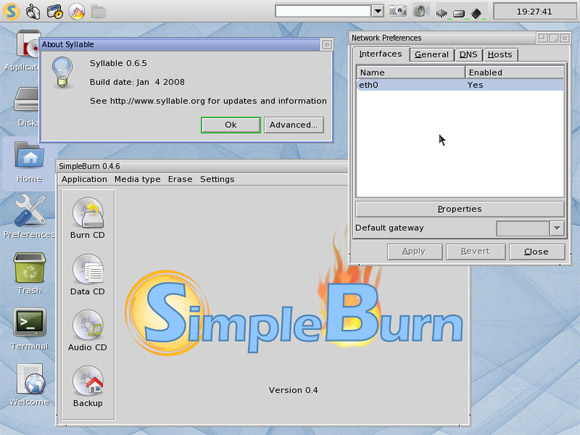
Syllable Desktop

Syllable is a free and open source operating system that was forked in 2002 from AtheOS, an AmigaOS clone. It’s intended as a lightweight and fast OS suitable for home and small office users.
Source model: Free and open source
License: GNU General Public License
Platform: x86
State: Alpha

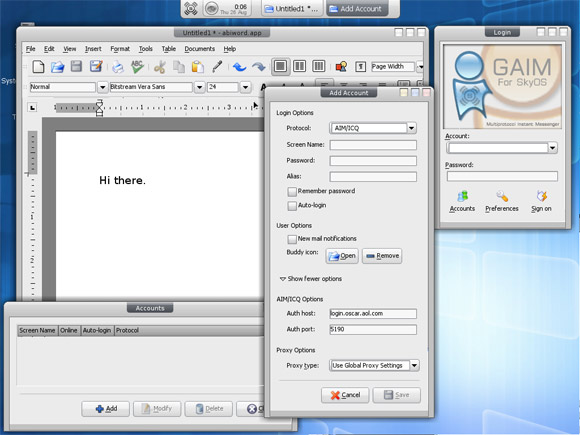
SkyOS

SkyOS is a closed source project written by Robert Szeleney and volunteers. It originally started as an experiment in OS design. It’s intended to be an easy-to-use desktop OS for average computer users. Well-known applications such as Firefox have been ported to run on SkyOS.
Source model: Closed source
License: Proprietary
Platform: x86
State: Beta

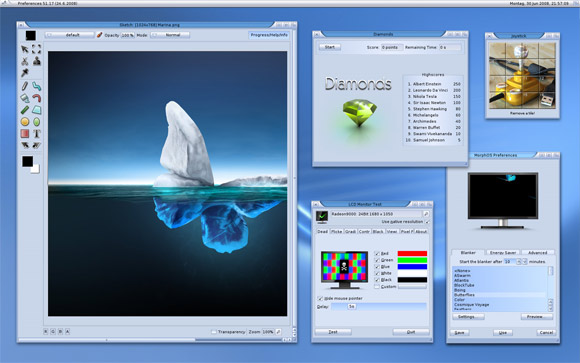
MorphOS

MorphOS is a lightweight, media-centric OS build to run on PowerPC processors. It is inspired by AmigaOS and also includes emulation to be able to run Amiga applications.
Source model: Closed source
License: Mixed proprietary and open source
Platform: Pegasos, some Amiga models, EFIKA

AROS Research Operating System

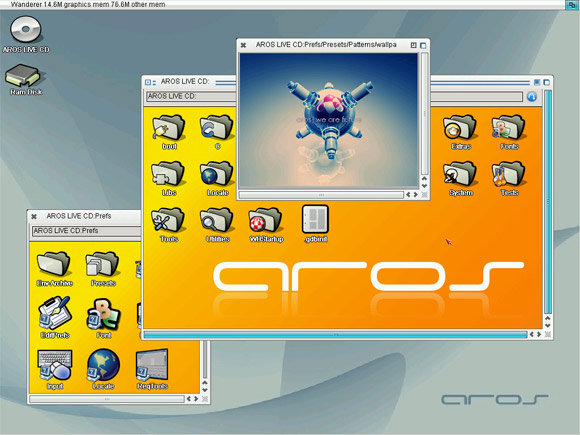
AROS is a lightweight open source OS designed to be compatible with AmigaOS 3.1 but also improve on it. The project was started in 1995 and can today be run on both PowerPC and IBM PC compatible hardware. It also includes an emulator that makes it possible to run old Amiga applications.
Source model: Open source
License: AROS Public License
Platform: x86 and PowerPC

Menuet OS

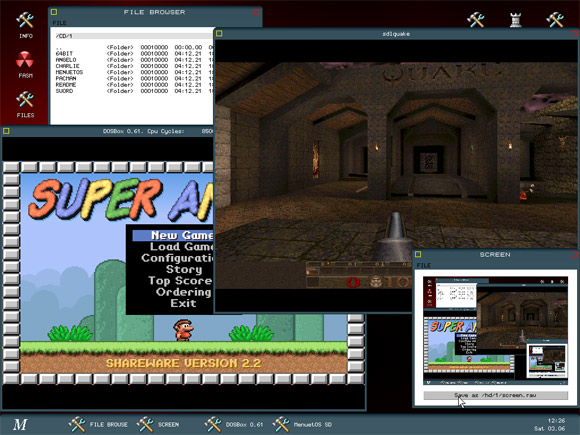
MenuetOS, also known as MeOS, is an operating system written entirely in assembly language which makes it very small and fast. Even though it includes a graphical desktop, networking and many other features it still fits on a single 1.44 MB floppy disk (for our younger readers, that was the USB stick of the 80s and early 90s).
Source model: Open source (32-bit version), freeware (64-bit version)
License: Menuet License
Platform: x86
State: Beta

DexOS

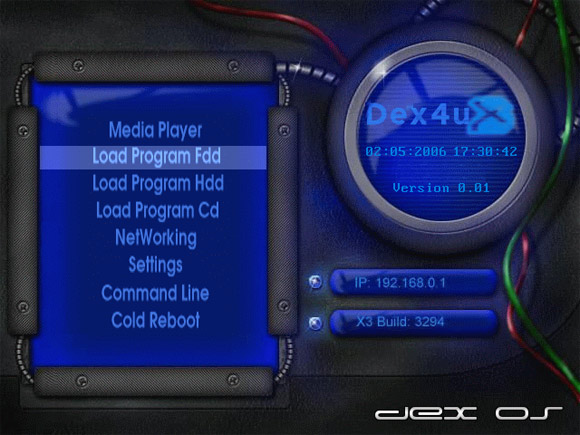
DexOS is an open source operating system designed to work like the minimalistic ones on gaming consoles, but for PCs. Its user interface is inspired by video game consoles and the system itself is very small (supposedly this one also fits on a floppy disk, like MenuetOS) and the OS can be booted from several different devices. Its creators have tried to make it as fast as possible.
Source model: Free and open source
Platform: x86

Visopsys

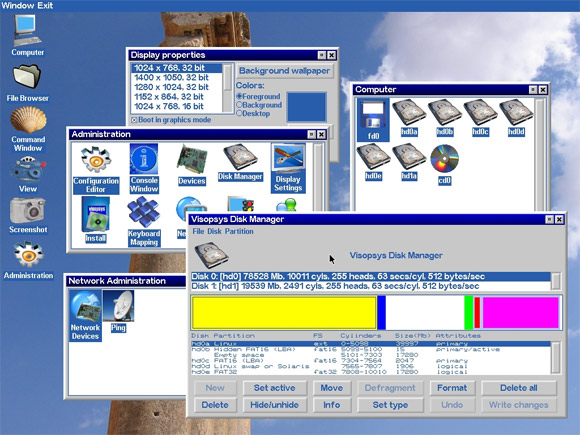
Visopsys is a one-man hobby project by programmer Andy McLaughlin. The development began in 1997 and the OS is both open source and free. Visopsys stands for VISual Operating SYStem.
Source model: Open source
License: GPL
Platform: x86
State: Final
Kolibri OS

Kolibri OS is the smallest OS in the world. It is written completely in assembly language without using any high-level programming languages like C or Python. KolibriOS is available in English, Russian and German. ISO Size when Zipped : 2.8 MB, ISO size when unzipped : 4.36 MB.


Features of KolibriOS:
  • Boots from several devices.
  • Graphical user interface based on VESA.
  • Development kit: code editor with a macro-assembler (FASM) integrated.
  • Pre-emptive multitasking, streams, parallel execution of system calls.
  • Supported file systems are FAT12, FAT16, FAT32 (long names support), NTFS (read only), ISO 9660 (including multisession).
  • AC’97 audio codec support for Intel, nForce, nForce2, nForce3, nForce4 and SIS7012 chipsets.
  • CD and DVD support.
  • USB support.

The OS Future

Even if none of these operating systems ever were to “make it” and become mainstream (and admittedly, some of them simply are not intended to be mainstream), the passion behind them is real, and many have the potential to introduce new and fresh ideas.
All this independent development can act as a kind of think tank, if you choose to look at it that way. It’s quite possible that concepts introduced by a niche OS will later be adopted by a larger player on the OS market.
There are lots of interesting things happening today with the rise of virtualization and the “always online” nature of today’s computers that opens up incredibly interesting possibilities. For example, what we have read about Microsoft’s internal research OS Midori (the one that will retire Windows) sounds highly interesting.
Wherever the future operating systems may come from, be it from the already established players or some kind of newcomer, we are looking forward to seeing what the future has in store for us. We suspect that there is a significant “jump” in the evolution coming up just around the corner.
What are your predictions for the future of operating systems?